Knowledge Base

Preserving for the future: Shell scripts, AoC, and more

Upgrading my main file server to CentOS 8

The story

With the recent slowdown in packages for CentOS 7, I have been preparing to update at least my main file server to CentOS 8. Thankfully, when I was migrating my entire infrastructure to Linux 3+ years ago, I architected my file server with an OS drive and a data drive. And from my vast stores of old hard disks, I pulled out a drive whose record indicates that it previously was the "C:\" drive for that exact same hardware, from 2015-2017. And now it is running instance 4 on that exact same platform, a Dell Precision Workstation 490. Before I was ready to schedule the downtime window, I practiced all the possible configs on a CentOS 8 vm. I wrote down the items I wanted to make sure get set up on the new install.

  • apache with exact configs
  • samba with freeipa user auth
  • nfs
  • Plex media server
  • my local mirrors of CentOS, Fedora, Devuan, and my OBS
  • Master sync
    • Google drive (rclone, from /root/.config)
    • SpiderOakONE (from /root/.config)
  • Rbup (my local backup shell script)
  • All cronjobs (mostly the above tasks)
  • Custom ssh config
  • FreeIPA auth for ssh
  • custom firewall rules
  • /etc/installed directory
  • custom Google Photos image sync (another rclone task)

Those are my notes before doing any work on the production system. So, after collecting my thoughts and config files and practicing on a vm, and selecting a downtime window, I shut down my file server, removed its OS drive, stuck in the new one, and installed CentOS 8 minimal. Then, I followed a bunch of steps, loosely in order, to replicate my previous setup. I had to load up my root ca cert, before I joined it to IPA, so dnf could get through my transparent proxy. I copy-pasted in the value from my workstation's /etc/ipa/ca.crt to /etc/pki/ca-trust/source/anchors/ca- ipa.example.com.crt.

sudo update-ca-certs

Then, I installed my minimal software.

sudo dnf --setopt=[install_weak_deps=False](/posts/2017/05/13/dnf-ignore-weak-dependencies/) install bgscripts-core bash-completion expect
sudo dnf --setopt=install_weak_deps=False install bc bind-utils cifs-utils cryptsetup dosfstools epel-release expect firewalld git iotop mailx man mlocate net-tools nfs-utils parted python3-policycoreutils rpm-build rsync strace sysstat tcpdump telnet vim wget
sudo dnf --setopt=install_weak_deps=False install screen p7zip
sudo dnf remove iwl*

I mounted up my data drive's logical volumes to /var/server1. And now came time for FreeIPA! With CentOS 8, FreeIPA is now in a "module" repository and since I need ipa-server-trust-ad, I have to use the full module (DL1).

sudo dnf --setopt=install_weak_deps=False install @idm:DL1 ipa-server-trust-ad ipa-client
time sudo ipa-client-install --force-join --mkhomedir --[principal=domainjoin](/posts/2020/01/15/freeipa-service-account-to-join-systems-unattended/) --password=SEEKEEPASS

I knew I would need --force-join because I was using the same hostname as before, and as is typical, I failed to remove the old host. Before logging in, I set up my user's home directory to use the data drive with a symlink.

sudo ln -s /var/server1/shares/bgstack15 /home/bgstack15

And now I could log in as my domain user! So now it was time for setting up Samba with FreeIPA auth. Instead of duplicating that content, just read the linked post. I am uncertain if I had documented this though, but I added this for good measure:

sudo setsebool -P samba_export_all_rw 1

Here is where I had forgotten my first config file. I had to plug in my old disk drive and fetch my /etc/samba/smb.conf. All my firewall configs in one fell swoop.

sudo cp -p /var/server1/shares/public/Support/Systems/server1/prep/*xml /lib/firewalld/services/
sudo firewall-cmd --reload
sudo firewall-cmd --permanent --add-service=http-example --add-service=freeipa-samba --add-service=nfs-mod --add-service=plexmediaserver
sudo firewall-cmd --reload

And for my nfs settings.

sudo dnf -y install nfs-utils
sudo systemctl enable rpcbind nfs-server --now

I set up my /etc/exports with my main shares:

/var/server1/shares 192.168.1.0/24(rw,sync,insecure)

And then update the running exports.

sudo exportfs -a

I had to copy in my mirror files for CentOS, Fedora, etc. I don't have a blog post for this topic, surprisingly. So go search it, until I write something about it. It's mostly just rsync to a known valid mirror for each distro and a cron entry. For cron, I just copied in my archived files. And then I read them to make sure I would have everything established for the jobs. Rclone for one:

sudo dnf install rclone

I was pleased to learn that rclone 1.51.0 is now packaged by the distro. I had to use a binary release in the past. My apache setup is a little more involved. Due to architectural reasons (something screwy with Plex, if I recall correctly), I serve http on the local network on a different port.

sudo dnf install httpd
sudo semanage port -a -t http_port_t -p tcp 180
sudo semanage port -a -t http_port_t -p tcp 181
sudo semanage port -a -t http_port_t -p tcp 32400
sudo semanage port -a -t http_port_t -p tcp 32401
sudo setsebool -P httpd_graceful_shutdown 1
sudo cp -pr /etc/httpd/conf.d /etc/httpd/conf.d.orig
sudo tar -C /etc/httpd -zxf /var/server1/shares/public/Support/Systems/server1/prep/httpd_conf.d.2020-11-12.tgz
sudo cp -pr /etc/pki/tls /etc/pki/tls.orig
sudo tar -C /etc/pki -zxf /var/server1/shares/public/Support/Systems/server1/etc_pki_tls.2020-11-13.tgz
sudo mv /var/www /var/www.orig
sudo ln -s /var/server1/shares/public/www /var/www
sudo restorecon -Rv /etc/pki
sudo mv /etc/httpd/conf.d/nss.conf{,.off} # mod_nss is not here on centos8 or in my install anyway
sudo systemctl enable --now httpd # or systemctl start httpd
sudo setsebool -P httpd_use_nfs 1 # because we did this on old server.
sudo setsebool -P httpd_unified 1 # fixes the cgi-bin operations, and required semodule --disable_dontaudit --build

I set up my local backup scripts which do not have a post on this blog yet. I set up SpiderOak by installing its rpm and expanding my tarball of /root/.config which also included the rclone config.

wget --content-disposition https://spideroak.com/release/spideroak/rpm_x64
sudo dnf install /etc/installed/SpiderOakONE.7.5.0.1.x86_64.rpm
sudo tar -C /root -zxf /var/server1/shares/public/Support/Systems/server1/dot-config.2020-11-12.tgz # this also includes the rclone config

I copied in my old /etc/installed directory to my new one, underneath "server1-letterless" sub-directory. I set up my old gnupg directory, for repository signing.

sudo tar -C /root -zxf /var/server1/shares/public/Support/Systems/server1/gnupg-dir.2020-11-12.tgz

And instead of mounting the nfs exports locally, I just set up symlinks.

sudo ln -s /var/server1/shares/public /mnt/public
sudo ln -s /var/server1/shares/bgstack15 /mnt/bgstack15

For X forwarding, so that the SpiderOak desktop application would work so I could check settings that were eluding me in the command line interface, I installed xauth.

sudo dnf install xauth

For Plex, I downloaded the latest rpm and installed it. I failed to record the exact filename or its link, but it's searchable. From my workstation, I opened an ssh session with port forwarding.

ssh -L 8888:localhost:32400 server1

So that I could visit localhost:8888 in a web browser, and set up Plex. I have signed my own cert for Plex and I placed it in a pkcs12 file. See hobo.house blog for instructions for that. So apparently I need yet another blog post.

# copy in /mnt/public/Support/Systems/server1/https-plex.ipa.example.com-plex.p12 to /var/lib/plexmediaserver/Library/Application\ Support/Plex\ Media\ Server/

Configure the web app to use that, and add my URL to the "custom server access URLs" field. I have some SELinux notes for Plex('s webhook in Apache). A summary:

time sudo checkmodule -M -m -o plexlog.mod /var/server1/shares/public/Support/Programs/Plex/webhooks/plexlog.te
time sudo semodule_package -o plexlog.pp -m plexlog.mod
time sudo semodule -i plexlog.pp
sudo dnf install jq

For the debmirror, I had to enable an additional repo that is not enabled by default in yum/dnf.

sudo dnf install --enablerepo=PowerTools lzma debmirror dpkg-dev

And then add my local user for obsmirror.

sudo useradd -u 1001 obsmirror

The long tail of checking backups

And the most important thing for a file server, of course, is to ensure backups are working.

Final thoughts

So either/or samba and ipa-server-trust-ad requires libX11. So for the first time, my headless server has X11 on it. I feel kind of icky; stay tuned to this blog for updates if I can somehow remove this dependency.
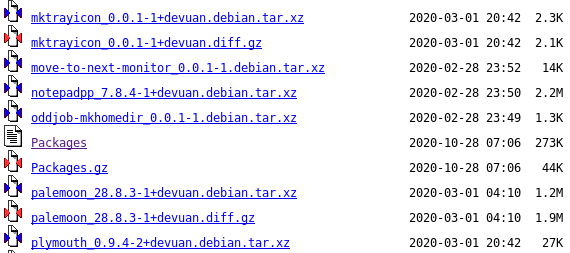
Squid allow short names for local sites

In my transparent web proxy, I wanted to make it so I could still visit http://server2:631 for my local cups instance. Even with the hosts_file configured in squid.conf, squid does not accept short hostnames that can be resolved. But what you can do, is configure squid to append your domain on unqualified domain names, and configure an ACL with all the local host names! Set up squid.conf with these additional entries:

apped_domain .ipa.example.com
acl localdst dstdomain "/etc/squid/axfr.txt"
always_direct allow localdst

And you need a command to populate that axfr.txt file. Thankfully, I run my own dns and I left zone transfers on (security considerations notwithstanding). So here's my comments around what is basically a one-liner.

 1
 2
 3
 4
 5
 6
 7
 8
 9
10
11
12
13
14
15
16
17
18
19
20
21
22
23
24
25
26
27
28
29
30
31
32
33
#!/bin/sh
# File: /mnt/public/Support/Systems/server4/usr/local/bin/squid_local_hosts.sh
# License: CC-BY-SA 4.0
# Location: server1
# Author: bgstack15
# Startdate: 2020-11-17 19:30
# Title: Script that Lists Net-Local Hosts
# Purpose: list all net-local hosts without the domain name, for squid on vm4
# Usage:
#    in a cron entry, nominally in /etc/cron.d/90_squid_local_hosts.cron
#    0 12 * * *   root   /mnt/public/Support/Systems/server4/usr/local/bin/squid_local_hosts.sh 2>/dev/null 1>/etc/squid/axfr.txt
#    And where axfr.txt was already established with proper mode and context
# Reference:
# Improve:
# Dependencies:
#    zone transfers are on in local dns
#    Settings in squid.conf:
#       append_domain .ipa.example.com
#       acl localdst dstdomain "/etc/squid/axfr.txt"
#       always_direct allow localdst

test -z "${domain}" && export domain="ipa.example.com"

get_net_local_hosts() {
   # Awk methodology
   # exclude the ones that start with underscore, which users will not be looking up for visiting via a web browser.
   # print unique ones
   # Grep methodology
   # exclude blanks and comments
   dig -t AXFR "${domain}" | awk "{gsub(\".?${domain}.?\",\"\",\$1);} \$1 !~ /^_/ && !x[\$1]++{print \$1}" | grep -viE '^[\s;]*$'
}

get_net_local_hosts

And as described, I have a cron entry.

0  *  *  *  *  root   /mnt/public/Support/Systems/vm4/usr/local/bin/squid_local_hosts.sh 2>/dev/null 1>/etc/squid/axfr.txt

Now, I haven't been running this long enough and with enough network changes to test things fully, so I don't know if squid will dynamically read the new axfr.txt contents should they change. I seriously doubt it. So one could probably adjust the service script or systemd unit to have a pre-exec hook of running the same contents as the cronjob. And now I can reach my cups instance without having to type in the full hostname, and without setting up client- side exceptions for using the proxy. I realize this whole thing is not very KISS, but it's fun anyways.

Set up GLSL in Wine for Artemis

Following up on How I run Artemis Spaceship Bridge Simulator on Devuan ceres, I wrote a script that will set the GLSL variable in wine. Basically, if Artemis Spaceship Bridge Simulator fails in Wine, the first thing to try is to disable GLSL (which I just learned is superseded, so I have to go test with that new key at some point). I used the Wine regedit utility to export my registry key to a file, artemis-disable-glsl.reg.

��Windows Registry Editor Version 5.00

[HKEY_CURRENT_USER\Software\Wine\Direct3D]
"UseGLSL"="disabled"

Obviously you can just copy this and modify it for the "enabled" value. And the main script.

 1
 2
 3
 4
 5
 6
 7
 8
 9
10
11
12
13
14
15
16
17
18
19
20
21
22
23
24
25
26
27
28
29
30
31
32
33
34
35
36
37
38
39
40
41
42
43
44
45
46
47
48
49
50
51
52
53
54
55
56
57
58
59
60
61
62
63
64
65
66
67
68
69
70
71
72
73
74
75
76
77
78
79
80
81
82
83
84
85
#!/bin/sh
# File: /mnt/public/Support/Games/Artemis/use-glsl.sh
# License: CC-BY-SA 4.0
# Author: bgstack15
# Startdate: 2020-11-10
# Title: Script that sets up GLSL in Wine for Artemis on Weaker Systems
# Purpose: Make it easy to toggle the registry setting
# History:
# Usage:
#    WINEPREFIX
#    GUESS=1  If set to any non-blank value, try to guess WINEPREFIX if WINEPREFIX is blank
#    ACTION=enable|disable  Enable or disable glsl. Normally underperforming systems need to disable glsl.
#    DEBUG
#    DRYRUN
# Reference:
#    /posts/2019/09/29/how-i-run-artemis-spaceship-bridge-simulator-on-devuan-ceres/
#    https://artemis.forumchitchat.com/post/show_single_post?pid=1303287265&postcount=7&forum=309502
# Improve:
#    2020-11-11 https://www.winehq.org/announce/5.0
#       says to use a different key now.
# Dependencies:
#    wine
# Documentation:

# FUNCTIONS
is_64bit() {
   # call: is_64bit "${WINEPREFIX}" && echo "this is 64-bit"
   _wineprefix="${1}"
   find "${_wineprefix}/drive_c/Program Files (x86)" -maxdepth 0 -printf '' 2> /dev/null ;
   #return $(( 1 - $? )) ;
   return $?
}

get_parent_wine_dir() {
   # call: get_parent_wine_dir /home/bgstack15/.wine-artemis/drive_c/Program\ Files/Artemis
   # returns: /home/bgstack15/.wine-artemis
   _inputdir="${1}"
   _thisdir="${_inputdir}"
   while ! basename "${_thisdir}" | grep -qE "wine" ;
   do
      _thisdir="$( dirname "${_thisdir}" )"
   done
   echo "${_thisdir}"
}

# validate input
test -z "${WINEPREFIX}" && test -z "${GUESS}" && {
   echo "Use GUESS=1 to force the guessing of which WINEPREFIX to use." 1>&2 ; exit 1 ;
}

test -z "${WINEPREFIX}" && test -n "${GUESS}" && {
   # will have to guess
   ARTEMISDIR="$( find ~/.wine-artemis ~/.wine32 ~/.wine /usr/share/wine /opt/wine -type d -path '*/.wine*' -path '*/Program\ Files*' -name 'Artemis' -print 2>/dev/null | head -n1 )"
   WINEPREFIX="$( get_parent_wine_dir "${ARTEMISDIR}" )"
   test -z "${WINEPREFIX}" && {
      echo "Fatal! Unable to find a wineprefix where Artemis is installed. Aborted." 1>&2
      exit 1
   }
   echo "Found ${WINEPREFIX} with Artemis installed." 1>&2
   export WINEPREFIX
}

test -z "${WINEARCH}" && {
   WINEARCH=win32
   is_64bit "${WINEPREFIX}" && WINEARCH=win64
   export WINEARCH
}

test -z "${ACTION}" && {
   echo "Using default action of \"disable\" glsl." 1>&2
   export ACTION=disable
}

# default
tf="/mnt/public/Support/Games/Artemis/artemis-disable-glsl.reg" 
case "${ACTION}" in
   disable|off|DISABLE|OFF|NO|0) :;;
   enable|on|ENABLE|ON|YES|1) tf="/mnt/public/Support/Games/Artemis/artemis-enable-glsl.reg" ;;
   *) echo "Unknown action \"${ACTION}\" so defaulting to disable." 1>&2 ;;
esac

test -n "${DEBUG}" && {
   echo "WINEPREFIX=${WINEPREFIX} WINEARCH=${WINEARCH} wine regedit ${tf}"
}
test -z "${DRYRUN}" && wine regedit "${tf}"

Use environment variables to control the operation! So to disable glsl, run: ACTION=enable ./use-glsl.sh As usual with my scripts, you can also use DEBUG and DRYRUN.

Age of Empires 2 Definitive Edition add root ca cert to trusted bundle

Overview

With the recent addition of a transparent web proxy to my network, Age of Empires 2 Definitive Edition was failing to install mods and other content. Thankfully, it uses an openssl- style root bundle file so I can just add my root certificate to it!

cat /etc/ipa/ca.crt >> /home/bgstack15/.local/share/Steam/steamapps/common/AoE2DE/certificates/cacert.pem

It is possible to run this game in Steam using Proton. The guide I used is on reddit.

Adding apache icons for bzip2 and xzip files like gzip

Overview

I wanted to set up Apache httpd to show directory listings and have specific icons for the different archive file formats. In my apache 2.4.6 on CentOS 7, I already see a compressed.png which is displayed for gzip tarballs. Apache
directory listing showing some question mark icons for well-known
filetypes I started investigating using fully custom icons, before I realized I should just use different colors of the extant compressed.png file!
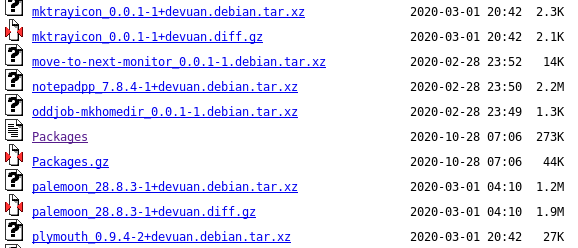
$ ls -al /usr/share/httpd/icons/compressed*
-rw-r--r--. 1 root root 1038 Nov 20  2004 /usr/share/httpd/icons/compressed.gif
-rw-r--r--. 1 root root 1108 Aug 28  2007 /usr/share/httpd/icons/compressed.png

So I decided to colorize the existing one. After some fiddling with ImageMagick, I came up with these statements. Because why do things manually when you can do them programatically even if it takes 6 times longer to learn and do it? Actually, the reason is I wanted to swap colors while keeping the transparency.

$ convert compressed.png -alpha set -channel RGBA -fuzz 20% -fill '#55DD55' -opaque red compressed-green.png
$ convert compressed.gif -alpha set -channel RGBA -fuzz 20% -fill '#55DD55' -opaque red compressed-green.gif
$ convert compressed.png -alpha set -channel RGBA -fuzz 20% -fill blue -opaque red compressed-blue.png
$ convert compressed.gif -alpha set -channel RGBA -fuzz 20% -fill blue -opaque red compressed-blue.gif

Great! So now I have the files in /usr/share/httpd/icons. So now to tell httpd to use them for bzip2 and xz (arbitrary colors), add them to apache somewhere. I added them to my virtual host definition.

   AddIcon /icons/compressed-green.png   .tar.bz2
   AddIcon /icons/compressed-blue.png   .tar.xz

And one service httpd reload later, my icons work! Apache httpd directory
listing showing the new
icons

References

http://www.imagemagick.org/Usage/color_basics/

Building an apt repo on CentOS that supports apt-file operations

This is a newer version of Building an apt repository on CentOS

Overview

My network infrastructure consists of CentOS 7 systems and Devuan client systems. I maintain mirrors of Devuan Ceres locally so I only need one outbound operation. In addition to the official repos (albeit stored in an unofficial manner), I also maintain my own collections of packages, as the first link in this post describes. One thing I noticed though, is that apt-file does not operate on the packages in my own repositories. So I used the wonderful free and open source nature of all the great tools that make up Devuan's apt software, and wrote my own set of tools that add the support for apt-file. Adding the apt-file support requires modifications to the server, as well as the clients. This is acceptable because I of course am the admin on my own systems and can add /etc contents at will.

Configuring the repo server

On the CentOS 7 server, you need to generate gpg keys (see Weblink 1). I have elected to store the passphrase in plaintext (bottom of Weblink 1) as file /root/.gnupg/passphrasefile

Repo update script

Write the wrapper script. Looking back I realize I should have set this up as a config file and then I just need to invoke the lib script as the main script, with parameters, but I'll save that for a future refactoring.

 1
 2
 3
 4
 5
 6
 7
 8
 9
10
11
12
13
14
15
16
17
18
19
20
21
22
23
24
25
26
27
28
29
30
31
32
33
34
35
36
#!/bin/sh
# Filename: update-exampledeb.sh
# Location: /mnt/public/www/example/repo/deb
# License: CC-BY-SA 4.0
# Author: bgstack15
# Startdate: 2017-07-23
# Title: Script that updates apt repo "exampledeb"
# Purpose: automate rebuilding the repo
# History:
#    2020-10-23 adding apt-file compatibility.
# Usage:
#    just call this after adding a new package to the repository
# Reference:
# Improve:
# Documentation:
# Dependencies:

# Set variables
export repodir=/mnt/public/www/example/repo/deb/
export ownership="apache:admins"
export filetypes="deb"
export gpgkey_passphrase_file="/root/.gnupg/passphrasefile"
test -z "${SKIP_SCAN}" && export SKIP_SCAN=0
test -z "${SKIP_CONTENTS}" && export SKIP_CONTENTS=0

# load library, which validates the above variables
. /mnt/public/www/example/repo/deb/scripts/apt-repo-lib.sh

# Prepare directory and files
fix_owner_and_mode

# Prepare repo for apt
make_apt_repo

# create the Release and InRelease files
make_release_files

Update repo library

All of the logic is in the dot-sourced library script.

#/bin/sh
# File: /mnt/public/www/example/repo/deb/scripts/apt-repo-lib.sh
# Location: server1
# License: CC-BY-SA 4.0
# Author: bgstack15
# Startdate: 2020-10-23
# Title: Library for apt repo update scripts
# Purpose: provide common functions for each apt repo to reduce code duplication
# History:
#    2020-10-22 the make_contents functions were started 
#    2020-10-23 this library started and took basically all logic out of the update script itself, because it is all boilerplate minus a few variables.
# Usage: only dot-source from an upate-*.sh repo update script.
# Reference:
#    /mnt/public/www/example/repo/deb/update-exampledeb.sh
# Improve:
#    actually bother to build content files per architecture.
# Documentation:
#    designed to run on CentOS 7 where not all apt tools exist.
# Dependencies:
#    gzip, gpg2

# Functions
_mc_inner() {
   word="${1}"
      name="$( dpkg-deb --show "${word}" | awk '{print $1}' )"
      # list dpkg contents and remove directories from listing
      dpkg-deb --contents "${word}" | awk '!/\/$/ {$1="";$2="";$3="";$4="";$5="";print}' | sed -r -e 's/^\s+//' | \
         # change listings to be relative paths, like reference Contents file, and append package name
         # this appears to be incomplete compared to reference Contents file because we do not include the "section" information, e.g., "contrib/admin/zfs-test"
         sed -r -e 's:^\./::' -e "s:$:\t${name}:;" ;
      # reset var just in case
      echo "DONE: ${word}" 1>&2
}

make_contents() {
   # call: make_contents "/path/to/dir" "reponame" "file"
   _path="${1:-.}"
   _reponame="${2}"
   test "." != "${_path}" && pushd "${_path}" 1>/dev/null 2>&1
   # use the . for path so total count of parameter characters is shorter
   for word in $( find . -name "*.deb" ! -name '*teamviewer*' ) ; do
      _mc_inner "${word}" &
   done | \
      # only show new entries, which hopefully will make sort faster. It is possible this is not useful.
      awk '!x[$0]++' | \
      # sort output and show only unique lines. This is required in my repos because I leave multiple versions of a single package around.
      sort | uniq
   popd 1>/dev/null 2>&1
}

fail() {
   _ec="${1}" ; shift 1 ;
   echo "${@}" ;
   return "${_ec}"
}

fix_owner_and_mode() {
   find "${repodir}" -exec chown "${ownership}" {} + 1>/dev/null 2>&1
   find "${repodir}" -type f ! -name '*.sh' -exec chmod "0664" {} + 1>/dev/null 2>&1
   find "${repodir}" -type f -name '*.sh'   -exec chmod "0754" {} + 1>/dev/null 2>&1
   find "${repodir}" -type d -exec chmod "0775" {} + 1>/dev/null 2>&1
   restorecon -RF "${repodir}"
}

make_apt_repo() {
   pushd "${repodir}" 1>/dev/null 2>&1
   if ! test "${SKIP_SCAN}" = "1" ;
   then
      dpkg-scanpackages -m . > Packages # this takes a long time to run
      gzip -9c Packages > Packages.gz
   fi
   if ! test "${SKIP_CONTENTS}" = "1" ;
   then
      make_contents . "" "file" > "${repodir}/Contents"
      wait
      cd "${repodir}"
      # apt-file needs -amd64.gz and -i386.gz files, based on default /etc/apt/apt.conf.d/50apt-file.conf
      for word in amd64 i386 all ; do cp -pf Contents "Contents-${word}" ; done
      for word in Contents* ; do ! echo "${word}" | grep -qE '\.gz$' && gzip -9c "${word}" > "${word}.gz" ; done
   fi
   popd 1>/dev/null 2>&1
}

make_release_files() {
   pushd "${repodir}" 1>/dev/null 2>&1
   # create the Release and InRelease files
   md5s="$( for word in Packages* Contents* ; do printf "%s %s\n" "$( md5sum "${word}" | cut -d" " -f1 )" "$( wc -c "${word}" )" ; done | column -t | sed -r -e 's/^/ /;' )"
   sha1s="$( for word in Packages* Contents* ; do printf "%s %s\n" "$( sha1sum "${word}" | cut -d" " -f1 )" "$( wc -c "${word}" )" ; done | column -t | sed -r -e 's/^/ /;' )"
   sha2s="$( for word in Packages* Contents* ; do printf "%s %s\n" "$( sha256sum "${word}" | cut -d" " -f1 )" "$( wc -c "${word}" )" ; done | column -t | sed -r -e 's/^/ /;' )"
   cat <<EOF > Release
Architectures: all
Date: $(date -u '+%a, %d %b %Y %T %Z')
MD5Sum:
${md5s}
SHA1:
${sha1s}
SHA256:
${sha2s}
EOF
   gpg --batch --yes --passphrase-file "${gpgkey_passphrase_file}" --pinentry-mode loopback -abs -o Release.gpg Release
   gpg --batch --yes --passphrase-file "${gpgkey_passphrase_file}" --pinentry-mode loopback --clear-sign -o InRelease Release
   popd 1>/dev/null 2>&1
}

# When dot-sourcing the library, validate all input parameters
test -z "${repodir}" && { fail 1 "Fatal! Need \"repodir\" defined." || exit 1 ; }
test -z "${ownership}" && { fail 1 "Fatal! Need \"ownership\" defined, nominally \"apache:admins\"." || exit 1 ; }
test -z "${filetypes}" && { fail 1 "Fatal! Need \"filetypes\" defined, nominally \"deb\"." || exit 1 ; }
test -z "${gpgkey_passphrase_file}" && { fail 1 "Fatal! Need \"gpgkey_passphrase_file\" defined." || exit 1 ; }

Putting it all together on the server

When I have a new package underneath /mnt/public/www/example/repo/deb/, I just need to run sudo /mnt/public/www/example/repo/deb/update-exampledeb.sh. Previously my separate repositories were using duplicates of a single script. But now, they can all reference this one library and the in-tree update script is basically an executable config file.

Configuring clients

My architecture of the server, with the flat repository style (i.e., without dists/ceres/main/contrib directories) made it difficult to configure clients to always fetch the Contents files which matter. The clients need the apt repo definitions adjusted, and a custom apt-file conf.d added. The apt repo, nominally file /etc/apt/sources.list.d/exampledeb.list, needs to look like:

deb [target-=Contents-deb target+=Contents-stackrpms] http://www.example.com/example/repo/deb/ /

The target commands tell apt to use the custom indexing definition from this next file. Configure apt with file /etc/apt/apt.preferences.d/52apt-file- stackrpms.conf

# File: /etc/apt/apt.preferences.d/52apt-file-stackrpms.conf
# Part of support devuan scripts
# This enables the flat apt repos in example to be supported by apt-file
Acquire::IndexTargets {
    deb::Contents-stackrpms {
        MetaKey "Contents-$(ARCHITECTURE)";
        ShortDescription "Contents-$(ARCHITECTURE)";
        Description "$(RELEASE) $(ARCHITECTURE) Contents (deb)";

        flatMetaKey "Contents-$(ARCHITECTURE)";
        flatDescription "$(RELEASE) Contents (deb)";
        PDiffs "true";
        KeepCompressed "true";
        DefaultEnabled "false";
        Identifier "Contents-deb";
    };
};

Looking back, I probably should have just learned how to use the built-in "Contents-deb-legacy" but why make things too simple? I accomplish the client configuration on my own network with a script that does a couple of extra things, but I will not cover everything that it does here.

  1
  2
  3
  4
  5
  6
  7
  8
  9
 10
 11
 12
 13
 14
 15
 16
 17
 18
 19
 20
 21
 22
 23
 24
 25
 26
 27
 28
 29
 30
 31
 32
 33
 34
 35
 36
 37
 38
 39
 40
 41
 42
 43
 44
 45
 46
 47
 48
 49
 50
 51
 52
 53
 54
 55
 56
 57
 58
 59
 60
 61
 62
 63
 64
 65
 66
 67
 68
 69
 70
 71
 72
 73
 74
 75
 76
 77
 78
 79
 80
 81
 82
 83
 84
 85
 86
 87
 88
 89
 90
 91
 92
 93
 94
 95
 96
 97
 98
 99
100
101
102
103
104
105
106
107
108
#!/bin/sh
# File: /mnt/public/Support/Platforms/devuan/set-my-repos.sh
# Location:
# Author: bgstack15
# Startdate: 2019-08-10 16:02
# Title: Script that Establishes the repos needed for Devuan
# Purpose: Set up the 3 repos I always need on devuan clients
# History:
#    2020-02-01 customize clients for devuan-archive
#    2020-10-23 add apt-file compatibility
# Usage:
#    sudo set-my-repos.sh
# Reference:
#    /mnt/public/Support/Platforms/devuan/devuan.txt
# Improve:
#    need to control the sources.list file itself to have the main, contrib, etc., for ceres.
# Documentation:

test -z "${ALLREPOSGLOB}" && ALLREPOSGLOB="/etc/apt/sources.list /etc/apt/sources.list.d/*"
test -z "${REPOSBASE}" && REPOSBASE="/etc/apt/sources.list.d"
test -z "${PREFSBASE}" && PREFSBASE="/etc/apt/preferences.d"
test -z "${ADDLCONFBASE}" && ADDLCONFBASE="/etc/apt/apt.conf.d"

# confirm key
confirm_key() {
   # call: confirm_key "${PRETTYNAME}" "${SEARCHPHRASE}" "${URL_OF_KEY}"
   ___ck_repo="${1}"
   ___ck_sp="${2}"
   ___ck_url="${3}"
   if apt-key list 2>/dev/null | grep -qe "${___ck_sp}" ;
   then
      :
   else
      # not found so please add it
      echo "Adding key for ${___ck_repo}" 1>&2
      wget -O- "${___ck_url}" | sudo apt-key add -
   fi
}

# confirm repo
confirm_repo() {
   # call: confirm_repo "${PRETTYNAME}" "${SEARCHPHRASE}" "${SEARCHGLOB}" "${FULLSTRING}" "${PREFERRED_FILENAME}" "${OVERWRITE}"
   ___cr_repo="${1}"
   ___cr_sp="${2}"
   ___cr_sf="${3}"
   ___cr_full="${4}"
   ___cr_pref="${5}"
   ___cr_overwrite="${6}"
   if ! grep -E -qe "${___cr_sp}" ${___cr_sf} ;
   then
      # not found so please add it to preferred file
      echo "Adding repo ${___cr_repo}" 1>&2
      if test "${___cr_overwrite}" = "true" ;
      then
         # overwrite, instead of append
         echo "${___cr_full}" > "${REPOSBASE}/${___cr_pref:-99_misc.list}"
      else
         echo "${___cr_full}" >> "${REPOSBASE}/${___cr_pref:-99_misc.list}"
      fi
   fi
}

confirm_preferences() {
   # call: confirm_preferences "${PRETTYNAME}" "${FILENAME}" "{PACKAGE}" "${PIN_EXPRESSION}" "{PRIORITY}"
   ___cp_prettyname="${1}"
   ___cp_pref="${2}"
   ___cp_package="${3}"
   ___cp_pin_expression="${4}"
   ___cp_priority="${5}"

   ___cp_tempfile="$( mktemp )"
   {
      echo "Package: ${___cp_package}"
      echo "Pin: ${___cp_pin_expression}"
      echo "Pin-Priority: ${___cp_priority}"
   } > "${___cp_tempfile}"

   diff "${PREFSBASE}/${___cp_pref}" "${___cp_tempfile}" 1>/dev/null 2>&1 || {
      echo "Setting preferences for ${___cp_prettyname}"
      touch "${PREFSBASE}/${___cp_pref}" ; chmod 0644 "${PREFSBASE}/${___cp_pref}"
      cat "${___cp_tempfile}" > "${PREFSBASE}/${___cp_pref}"
   }

   rm -f "${___cp_tempfile:-NOTHINGTODEL}" 1>/dev/null 2>&1
}

# REPO 1: local exampledeb
confirm_key "exampledeb" "bgstack15.*example\.example\.com" "http://www.example.com/example/repo/deb/exampledeb.gpg"
confirm_repo "exampledeb" "target.*example\/repo\/deb" "${ALLREPOSGLOB}" "deb [target-=Contents-deb target+=Contents-stackrpms] http://www.example.com/example/repo/deb/ /" "exampledeb.list" "true"

# REPO 2: local devuan-deb
confirm_key "devuan-deb" "bgstack15.*example\.example\.com" "http://www.example.com/example/repo/deb/exampledeb.gpg"
confirm_repo "devuan-deb" "target.*example\/repo\/devuan-deb" "${ALLREPOSGLOB}" "deb [target-=Contents-deb target+=Contents-stackrpms] http://www.example.com/example/repo/devuan-deb/ /" "devuan-deb.list"

# REPO 3: local obs
#confirm_key "OBS bgstack15" "bgstack15@build\.opensuse\.org" "https://download.opensuse.org/repositories/home:bgstack15/Debian_Unstable/Release.key"
#confirm_repo "OBS bgstack15" "repositories\/home:\/bgstack15\/Debian_Unstable" "${ALLREPOSGLOB}" "deb http://download.opensuse.org/repositories/home:/bgstack15/Debian_Unstable/ /" "home:bgstack15.list"
confirm_key "OBS bgstack15" "bgstack15@build\.opensuse\.org" "http://www.example.com/mirror/obs/Release.key"
confirm_repo "OBS bgstack15" "mirror\/obs" "${ALLREPOSGLOB}" "deb http://www.example.com/mirror/obs/ /" "home:bgstack15.list"

# REPO 4: local devuan-archive
confirm_key "devuan-archive" "bgstack15.*example\.example\.com" "http://www.example.com/example/repo/deb/exampledeb.gpg"
confirm_repo "devuan-archive" "target.*server1((\.ipa)?\.example\.com)?(:180)?.*example\/repo\/devuan-archive" "${ALLREPOSGLOB}" "deb [target-=Contents-deb target+=Contents-stackrpms] http://server.ipa.example.com:180/example/repo/devuan-archive/ /" "devuan-archive.list"
confirm_preferences "devuan-archive" "puddletag" "*" "origin server1.ipa.example.com" "700"

# ADDITIONAL APT PREFS
# important for the [target] stuff to work on repos so apt-file can work
cp -p "$( dirname "$( readlink -f "${0}" )")/input/52apt-file-stackrpms.conf" "${ADDLCONFBASE}/"

Backstory

I want to be able to view the contents of my packages without having to install them first. Apt supports this, but it took half a day to discover how to generate the Contents file, get it listed in the Release/InRelease file, actually generate an InRelease file (the gpg-signed Release file), and get clients to pull down the Contents files. Coincidentally, apt clients store the Contents files compressed with lz4, and not gzip like apt repos tend to provide. Go figure. I found nothing on the Internet for using apt-file with flat apt repositories, so I am assuming this is an original concept. I'm guessing all the shops that bother with custom repos use one of those [DebianRepository Setup tools. I assume all those Debian-focused apt repo tools already take all these steps, but my limitation here was CentOS. It makes for a fun challenge, that is solvable within my skillset and thanks to the open source nature of these great tools.

References

Weblinks

Building an apt repository on CentOS gpg key instructions Package for CentOS 7: gnupg2-2.2.18-2.el7 newer version of gpg so the apt tools work in CentOS

Local files

/usr/share/doc/apt-file/README.md.gz

Manpages

apt-file(1)

Plex Media Server: add root ca cert to trusted bundle

Solution

If you run Plex Media Server on a network that has a transparent web proxy, you might need to add your root ca certificate to the trusted store used by Plex.

Error message

In the log file, you could see a message like this.

Oct 06, 2020 15:53:44.564 [0x7f14897fa700] WARN - HTTP error requesting POST https://plex.tv/api/claim/exchange?token=xxxxxxxxxxxxxxxxxxxxioa5lM (60, SSL peer certificate or SSH remote key was not OK) (SSL certificate problem: self signed certificate in certificate chain)

Backstory

I checked the rpm contents, and thankfully found a standard pem-format root cert bundle!

[root@server1|/var/lib/plexmediaserver/Library/Application Support/Plex Media Server]# rpm -ql plexmediaserver | grep pem
/usr/lib/plexmediaserver/Resources/cacert.pem

Just add your root certificate (mine is from FreeIPA) to this bundle, and restart plex!

cat /etc/ipa/ca.crt >> /usr/lib/plexmediaserver/Resources/cacert.pem

Awk: compare version strings

When I was working on my dpkg for notepad++, I discovered that the naming convention changed for the release assets. So starting with version 7.9, the filenames include ".portable" instead of ".bin." I don't care about the change, but I need my automatic downloader to handle it. So, I had to add some logic for checking if the requested version number is greater than or equal to 7.9. But there is another layer of sub- version to deal with, because I know the previous release was 7.8.9. So I whipped up some awk to help me.

echo "7.8.9" | awk -v 'maxsections=3' -F'.' 'NF < maxsections {printf("%s",$0);for(i=NF;i<maxsections;i++)printf("%s",".0");printf("\n")} NF >= maxsections {print}' | awk -v 'maxdigits=2' -F'.' '{print $1*10^(maxdigits*2)+$2*10^(maxdigits)+$3}'

The output will look like:

70809

Which can then just be compared as a number with 70900 and then I can use the new naming convention. The tunables in this snippet include the awk variables: maxsections, and maxdigits. If the input version strings were to contain large numbers, such as "7.20.5" or "6028.423.2143" then you can increase the maxdigits. I realize that the second awk statement only handles a hard-coded amount of 3 sections. I need to figure out how to improve it so it can dynamically handle the number of sections defined in "maxsections" and handle the output when the maxsections is lower than the amount of fields being printed.

Package for Devuan: myautomount

Introduction

When I read DistroWatch a few weeks ago about Project Trident making it easier to access removable media, I was intrigued. And when I clicked through and read the announcement from Project Trident directly, it was even more fascinating! In the past, on the Devuan mailing lists and irc channels, I have seen references to some community members' projects for auto-mounting removable media. I had never investigated them though. But this news article from a fascinating distro inspired me to dig around to find their implementation. I finally found it.

Discussion about trident-automount

The utility is written in Go. I have nothing specifically against Go, but I don't feel like trying to find a compiler and learning how to package up Go applications. But the utility is simple enough that I was able to read it. Additionally, I felt that due to its wrapping around udevadm monitor , that it wasn't doing anything that could not be done in shell. So I wrote my own version! But more on that in a minute. The trident-automount utility creates xdg-style .desktop file for each "added" (discovered) attached block device. These .desktop files are placed presumably somewhere the Lumina desktop environment reads some of its menu entries.

Translating to my own implementation

I started off with an almost line-for-line translation to shell+coreutils. Watch the output of udevadm monitor, and generate .desktop files.

Adding extra bits

I decided that it wasn't enough to add .desktop files; I wanted to re- implement the old-school non-free-OS removable media tray icon. I want to see a little icon appear when a flash drive is plugged in, and that icon provides a menu. Now, due to how autofs works especially with the short time-out as established by the trident-automount example, I don't need dedicated buttons to umount anything. So my myautomount-trayicon menu entries will execute the xdg "Exec=" field, which is normally going to be the "xdg-open /browse/sdb2." So yes, it relies on you having definitions for xdg-open to open your preferred file manager. I use xfe and sometimes Thunar (from Xfce). And then I decided that I didn't want to depend on GtkStatusIcon which has been "deprecated" for probably a decade by now. So I added to the trayicon python program the ability to use the XApp library! I added a boolean to the script which the admin can set. I did not yet make this a tunable in the makefile. I need to work on that.

Putting it all together

So now, my OBS space has a package you can install in Debian-family distros, including Devuan GNU+Linux! Myautomount does not depend on dbus or systemd. It relies on python3, autofs, and sudo. Go check it out! Or you can use the source code for whatever you want.

Inotifywait notes

This is probably my most useful snippet for inotifywait. It will watch all items underneath /tmp/qux for the listed events and use the time format listed. Unfortunately I was unable to get it to emit UTC timestamps, but that's OK because I can at least get it to display the offset.

inotifywait -m --exclude '(.*.swp|.git.*)' -r /tmp/qux -e modify,moved_to,move_self,create,delete,delete_self --format '%T % e %w%f' --timefmt '%FT%T%z'